
There's a reason why the terms "Art" and "Mystery" are so often associated with shoemaking. Even though it's one of the oldest organized professions, so very little of it was recorded. Diderot attempted to write about it in the 18th century, and did a decent job for someone who knows nothing about the process. There will be hiccups and blank spots in any book like that, however. And the majority of books on the subject don't appear until after 1830, when machines are beginning to threaten the old ways. There is still a small number of people around the world who hand build shoes, an even smaller number of those who do the whole process by hand, and even fewer who do historical shoes in such a manner. I'm in the process of learning these techniques, and even without the mystery part they are still a huge artistic challenge.
I'm at the point where my last is just about complete and ready to start patterning the uppers. To get here I've called upon experiences in sewing, pottery, glove-making, wood-carving, and silhouette work. It may not look like much yet, but it's getting to the exciting part!
 After choosing our last size we decided if there were any minor adjustments to be made. I'm making a slightly pointed toe, so a little length was needed. Wrapping, pulling, hammering, and tacking a thick piece of leather down around the toe creates a "Toe Pin". This is pasted directly to the last since it's not meant to be removable (for this shoe, after it can be).
 I'll also be making an "Instep Leather", similar to the one shown center. It looks very much like a shoe horn! It sits on top of the last, giving you the necessary circumference measurements, the right silhouette, and it pulls out first in the end to allow room for the wooden last to be removed. The other tools shown are the nippers (left) for pulling out tacks and nails, the hammer pliers for pulling the leather and hammering in tacks/nails, and the shoemakers knife (the most important tool of all).
 Here's what the beginning of the instep leather looks like, formed around the last. I've begun to bevel the edges down on both pieces. They'll eventually be too thin to see a bump on the shoe formed around it. The instep is not pasted down, since it's meant to be removable during the process.
 This is how thick that toe pin leather is. Amazing how it stretches and contracts!
 Pasting a second layer to the instep leather. It gets built up far above my measurements so it can be carved down to the right shape. The multiple tacks hold the wet leather in place until it dries and shapes properly.
 The last piece for the instep. The side view, when carved down, will be a straight slope. No dipping down, it creates an ugly line for the shoe. The center height is necessary, the carving mostly occurs from the sides.
 I missed getting a picture in between, but this is what occurs after carving down both pieces. Working with women's shoes there is often fabric involved, so a dark tanned leather would likely bleed on it. What you see covering the pieces is called Whittaw. It's thin, smooth, and won't cause damage to the fabric. There's also another thin piece of leather pasted under the instep leather, grain side out, for smooth removal. There will be two holes at the top; one for a large nail to anchor the instep to the last, the other for a cord to pull on for removal.
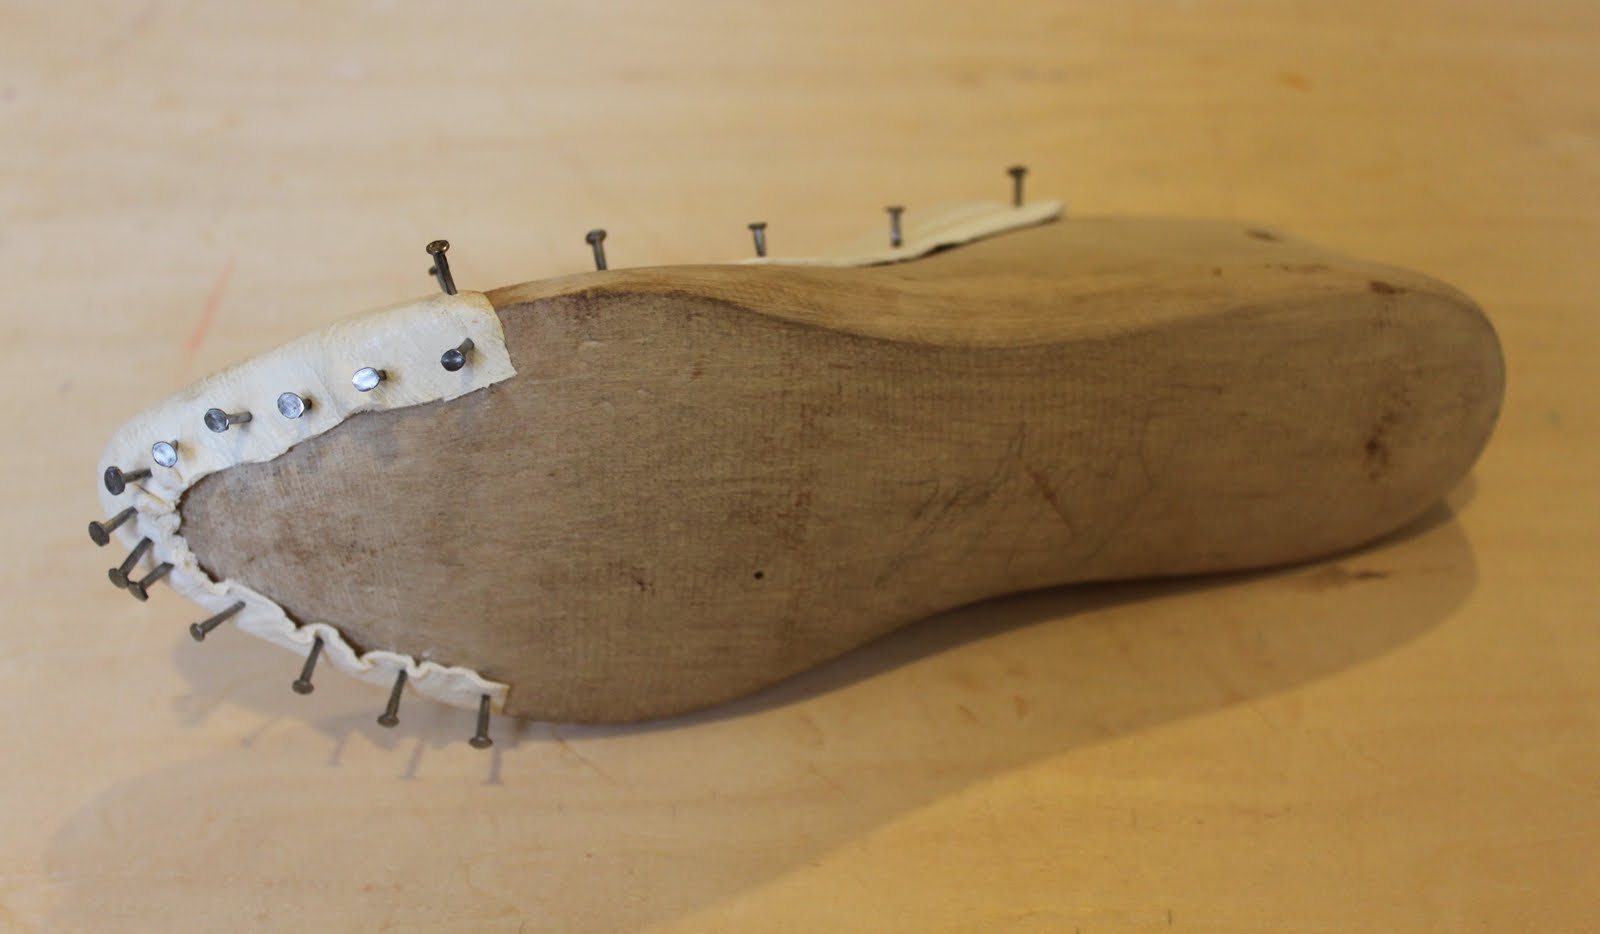
2 comments:
I'm so jealous that you're making shoes! This is on my list of things to do...someday. But instructional reasources are hard to find! I'll be following these posts with baited breath. :) So far it looks beautiful and exciting.
Dear Nicole,
Oh, my goodness. Why am I not surprised that you are learning this skill.
Entirely fascinating, and I had utterly no idea that the leather was whittled. Wow. Thank you for taking us along on this journey!
Very best,
Natalie
Post a Comment