Sunday, January 9, 2011

Brunswick Jacket

The first inside and out of the year, my Brunswick jacket.  This was started, not surprisingly, in another Burnley and Trowbridge workshop.  I'll try to do the next post on the history and variants of this garment (there are a lot!).  What defines a Brunswick is a sacque back jacket with a waistcoat-like front, hood, and removable long sleeves.  Now, the waistcoat varies in appearance, as do the trimmings, cuffs, etc.  But, we'll get into all that in the next post.
I chose to make my ensemble out of a gorgeous yellow corded silk.  It has a rather stiff weight to it, so it works wonderfully as a winter garment.  I wore it outside for two hours earlier in December without feeling chilled (then my feet got cold).  It's lined with silk taffeta in the hood and lower sleeves.  Everything else is lined in plain white linen.

I made the waistcoat a separate garment (options!).  I wanted a little bit of extra warmth AND the option to use a stomacher front and quickly create a pet-en-l'air.  The trimming all over the garment is just pleated self-fabric.  I ended up doing death head buttons, despite promising myself I wouldn't (it's almost like an addiction).  However, the fabric just wasn't working well to cover buttons and metal seemed out of place.

As you can see here, the back is only one layer of fabric rather than two.  Lacing up the back allows for more adjustment in size.  Useful since the jacket is always adjustable.

You can also see the extra piece of fashion fabric at the back top.  The jacket neckline is lower so it wouldn't do to have white linen peaking out!

The jacket construction is just like a regular sacque back gown or jacket.  The laces across the lining in back keep the garment "fitted" to the body, although not so much as English gowns would be.  One of my ties apparently popped loose and needs to be re-tacked (oops).  The lining attaches to the fashion fabric just before it ends to keep from having too much of a sail on windy days.  I trimmed the separate sleeve cuffs with more pleats and silk ribbon bows.  The lower sleeves are separate and basted in.

The side pleats are a bit easier to see here.  Everything is double pleated and the side pleats do have pocket slits.  The back neck is finished with an extra piece that folds to the inside.  I chose to leave the skirts unlined since my fabric was weighty enough for all the pleating.  Much more would have been bulky, especially in back.

The trimming continues all the way around the hem.  The double back pleats (deep enough to just barely overlap inside) are tacked down on top for a few inches.  The lower sleeves have a few inches left open on the seam to get your hand through (they're rather tight) and possibly show off the lovely ruffles on your shirt.  The hem has a slight dip in length in back as well.

Pin the jacket to the waistcoat over a habit shirt with a cravat and pair with a matching petticoat and we're ready to travel! 

Wednesday, January 5, 2011

Hemming

Although it's often the last, and seemingly most simple, step in making a garment, there are a lot of choices that go into a hem. How high? How much turned under? Taped? Faced? Growth tucks? Or even embroidery?

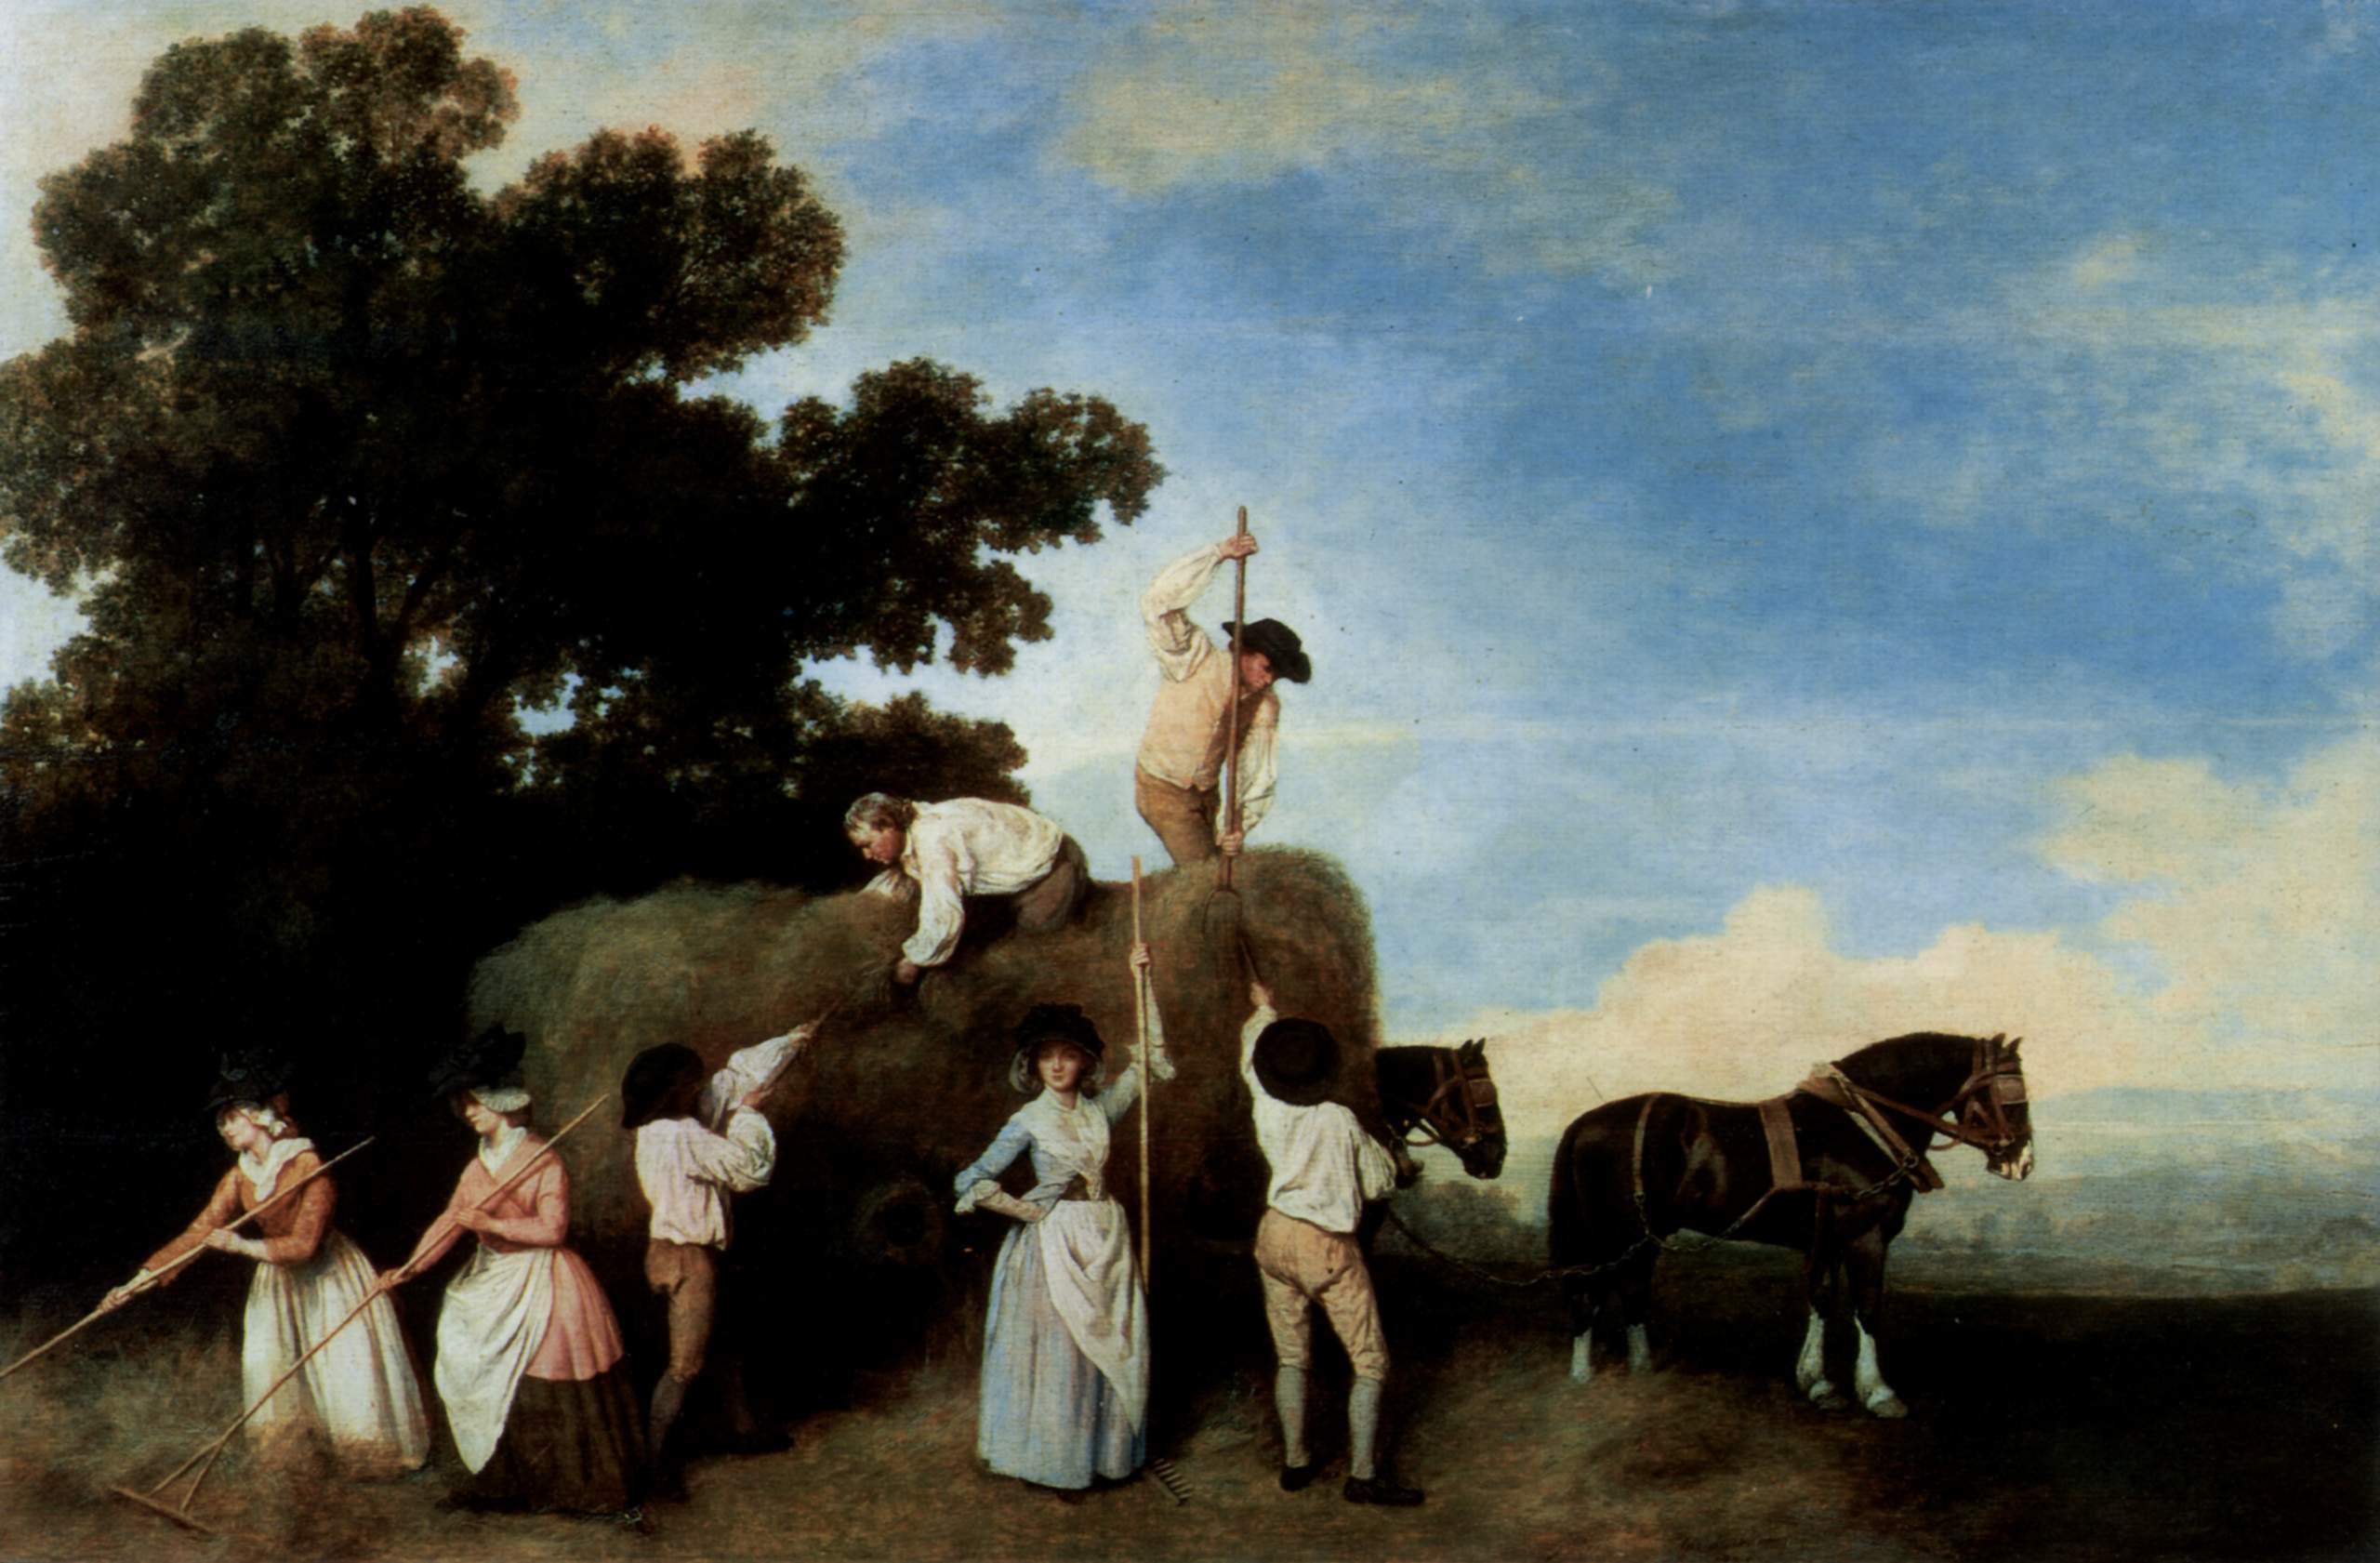
Height mostly varies by class (or some "character" choices) due to the way a garment is used. A silk gown worn mostly inside can be two inches off the floor, or even train in formal situations. But if you're outside working over a fire pit, it would be filthy, ragged, or even dangerous. The general "average" that I like for late 18th century is 3-4". It stays off the ground, only gets dirty when it's raining, but it still looks very nice. I would never go more than 6" up. Even George Stubb's Hayworkers aren't more than 3" up. You aren't going to catch a hem on your shoe that high, nor would it touch the ground when bending over slightly. Be practical, it's easier to hem something another 1/2" or 1" up if it is becoming ragged than to let down.
When it comes to a matching gown/petticoat I usually make the petticoat 1/2" shorter, although I'm sure some of the mis-matched pieces I wear are an inch shorter. Much more and you might consider polonaising the gown to make it less obvious. I try to make all of my petticoats in that range, whether they have a ditto gown or not, since I don't re-enact a wide variety of classes (the fabric would be different quality any way).
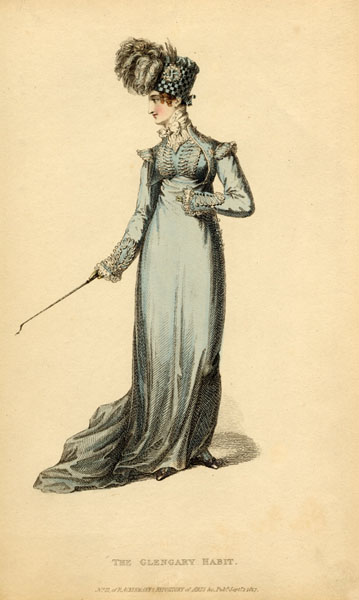
Now, early 19th century follows the same rules of class and use, but tends to be longer in length. Walking gowns rise to the ankle, while many afternoon outfits even have trains. Formals are commonly seen with longer lengths in back. Riding Habits are also very long (compared to 18th century habits of normal heights).

The actual hem amount turned under is generally very small. It saves fabric that way. But, it doesn't mean you can't have an inch deep hem, I just wouldn't go much over that. Mine are usually 1/4" or 1/2" turned twice. I'm finding a slightly deeper hem common in the early 19th century, but I haven't researched that too much yet.
Now, there are two exceptions to this style of hem. Binding the bottom edge with a wool tape, often seen on quilted or wool petticoats (even more often with riding habits) allows you to have no turn up or just one turn. If you have a petticoat you want to go back-and-forth in lengths with (two wearers or two personas) that would work well since you would only have to stitch up the shorter length when needed. Or if you cut something a little too short and need that last inch.
Exception two; Silk gowns sometimes have facings. Usually a "cheaper" plain taffeta that seams to the bottom and can fold up a number of inches. Very often seen with trained gowns since it prevents a lot of dirt and wear on the expensive fabric. Easy and cheap to replace this way.

Growth tucks (or pleats) are something seen on many children's garments of the 18th century. Growing children and sharing clothing make them very practical. In the very late part of the century when gauzy dresses are coming into style (already very similar to a child's dress) we start to see them appear in adult clothing. They last through the 1860s. Usually around an 1" deep you can find examples with between 2 and 7 pleats (more later on). On a woman's gown it isn't meant to be adjustable, you even see them on trained gowns. In the 1820s they begin to pad the pleated sections, creating a precursor, perhaps, to the cage crinoline of the 1850s onward. Note on my first link, the lady on the right appears to have pleats, possibly decor on her petticoat. Whether it's an artists flare, formerly a fancier ladies, or a way to make due with second-hand and no cutting I don't know. Might be a fun challenge to seek out more of those!

Now, there is an oddity to how to hem; embroidery. Not just decorating a turned hem, but actually finishing it. Sometimes with scalloping along the edge. Not the most practical to make, but very pretty. Once again, it seems to come with the gauze trend. You do see it on under-petticoats of the 19th century as well.

Don't just look at what other people have made, take the time to do a bit of research specific to your year, fabric, and character. While museum extants show types of hems, their length is obviously skewed by the mannequins used. If you want to see good examples of fashionable lengths, fashion prints are wonderful. For more common folk of the 18th century, John Style's Dress of the People has many paintings of that class you can't easily find online.

Saturday, January 1, 2011

Happy New Year!

With the turn of the year, I sincerely hope things will be a bit more predictable. I'm hoping to get a post out every week. Between my husband's deployment, my mother moving, sometimes working three part-time jobs, running a business, and beginning construction on our third floor I've hardly had time to breath! So, let me catch you up with the projects I hope to feature this year. And, by all means, if you don't see something you want to know more about, please request it!

I've begun spanning more than just the 1770-85 range, moving into the 1812 period and even Civil War this year. With the anniversaries of both coming up soon I've had work for others that took me this direction. I do want to feature a little bit about those time periods, but how much will depend on your interest and response. But, to the garments completed and soon to show.

I did a few less traditional 18th century garments as well as the old staples in the last six months. Starting with a Polonaise Gown, not a gown which was polonaised, but the loose-fit front type. Then on to a Brunswick Jacket, complete with all the pieces. And beginning a hand-made pair of shoes. Even a "pirate" costume, which is really a very accurate 1700 fitted jacket from an original print. Of course, throw in another pair of stays to help rescue my old well-loved pair, a long cloak, and a simple wool gown. I've also begun a full suit for my husband.

As I posted about before, I made a simple 1812 gown and corset earlier in the year. I'm just now finishing up a more formal gown and an unusual undergarment to go with it. I've also got a riding habit planned and at least one more gown for that period.

I did get the opportunity to make a few 1860s clothing items (and even a 1840s gown for Dolley Madison), but they really aren't mine to post. However, between the upcoming 150th anniversary of the Battle of Williamsburg and the inspiration from said garments, I am looking to make a number of pieces from this time period as well. Right now, it looks like mainly the basics: chemise, corset, drawers, and hoop. I'm thinking of making a summer gown and a jacket ensemble, but we'll see as research progresses. I'd forgotten how hard it can be to start learning about a new time period!

What I would like to hear from all of you are the topics you're interested in. I will certainly do an inside-and-out on all of them, and I'm hoping to do an article on choosing proper fabrics. If you want to see more detailed instructions or research on any of the aforementioned items, let me know!

Saturday, May 15, 2010

Anglaise Inside and Out

I recently made two Robe A l'Anglaise (English back) gowns. Here are the inside and out pictures of them both:

The first is made from camlet, a mixture of silk, wool, and linen. The skirt is polonaised by ribbons and thread rings on the inside. Front is closed and secured with straight pins. I added a box-pleat trim to the edges.
The back has two pleats which are stitched down. I used two full widths for the back and skirt, seaming together at CB. The fronts lap over the back and are stitched down.
Closer view of the spaced back-stitch used and the pleating. I used 1/4" pleats, but 1/2" are common as well. Notice that the pleats change directions at the pocket slit. You rarely see that on modern reproductions, but it was the most common way to do it historically. There are examples that have them facing one direction as well, but you may find that this way helps with the center back pleats (instead of creating a box pleat on either side of the long back pleats).
The trimming was folded under at the edges and tacked down in four spots on each pleat.
I chose to keep the lining loose at bottom and use it to cover the pleats. You can finish the bodice off entirely and whip the top of the pleated skirt to the bodice as well. That option allows for easier adjustment of size later, but doesn't work as well for a easily fraying fabric. The armscye seams are left raw and open. I've only seen them entirely finished on one women's garment, and we're pretty sure it was made by a male tailor with some odd ideas. Some do have the top half of the sleeve inserted into the bodice, but the lower half then comes out raw. You can whip the edges, but I've found that they tend not to fray too much. Maybe if the garment will be washed?
The second gown is linen. It was made off of the same "shape" as the above gown, but has a few changes in style. I adjust the bottom front to be a narrower tab at the bottom and left off any trimming. The sleeves simply have three tucks in front to shape them.
The back pleats are inverted. There are not many examples of this, but they do exist. You can also choose to do more than just two pleats like my examples. I made a high, narrow neck-line, something increasing after 1775. Eventually gowns will have an almost diamond shaped back piece at the end of the century (most quartered-back as well)
I chose not to put in pocket slits on this skirt since it starts far enough back (and it was one less thing to do on a quick project). Therefore all of the pleats face CB. You can see the box pleats made to accommodate that. There are also a few double pleats at the back to take in some extra fabric.
I finished off the top of the back like all other edges, but you can place a cover piece over those raw edges instead. My pleats hit the corner, but many end mid-way on the shoulder seam. The cover would match those points and follow the shoulder seam up, fold over the edges, and be tacked down as a box shape on the inside.
Same construction on the inside as the first gown.

I know that there are some confusing aspects to building this type of gown, so I'll hopefully get instructions put up soon. Check out the back on this gown.

Saturday, January 30, 2010

Quilted Waistcoat

Hello! I promise I'm still alive! Things have been hectic with the wedding, my husband prepping for deployment, and a new puppy. However, most of that is slowing down. I finally got some images of my quilted waistcoat. I'll hopefully get to an informational post on those and jumps some time in a couple weeks. This one is made from a Duran textiles print that I got a remnant of and bound with linen tape. I used a cotton/bamboo batting on the inside since that's what I could find.

I'm in process on a gentleman's suit and my 1812 corset as well. Oh! And I haven't gotten my wedding pictures back just yet, but my photographers do have a preview up on their site.

Saturday, October 31, 2009

Riding Habit

Happy Halloween everyone! I have to work tonight, so no fun for me, but I at least will be in costume. But, to celebrate I figured I should get the habit up. To preface, it was patterned at a Burnley & Trowbridge workshop. I have previously posted on the riding habit shirt as well. It's made from a pearl green worsted wool, trimmed with silk velvet, and lined with silk taffeta. Style-wise it's a late '70s or '80s. The peaked cuffs, short skirt (too short for pocket flaps even), lack of skirt on the waistcoat, and the narrow collar really date it. So does the hat, but that's a whole different beast (trust me, that was an unpleasant journey). The buttons are silver twist.

From inside to out the shift, stays, shirt, petticoat, and other basic items have been touched upon before. The first habit piece on top of this is the waistcoat. I used a cinnamon silk taffeta for the fronts, both inside and out. The back is a plain linen. Nothing much unusual in stitching here. Edges are done in the tailor style with a spaced back-stitch (rather than the under-hand commonly used in mantua-making). The fronts were made first and all of the seams fold into the back lining area. Note the back doesn't have vents like men's waistcoats. Even if you choose to put a skirt on your waistcoat, the back stays short.
The buttons are simply self-covered wood. The pattern of the waistcoat is the same as the coat, except for the bottom (since mine has no skirt), and adding a small amount to the coat seam allowances for ease. Note the dart just above the bust line, it should happen at the top of your stays.
The coat is lined in the same taffeta, except for the sleeves which are linen. That wears better than silk and won't be as fretful to replace when the elbows and armpits wear out. The skirts are inserted up into the body with the lining hiding the seam. Unlike many gowns, the armscyes are closed as well. The back seam is back-stitched, the side seams are done like a gowns with top stitching.
The center back skirt has a vent, while the sides have pleats. They sit under the front section, both front and back fold twice so that the edges do not lay on the same side. Buttons are placed on the top and 1" up from the hem.
The collar is also lined with the silk. There is no interfacing in the collar (same goes for men's wear) and none in the cuffs since they are stitched on. However, the front does have interfacing pieces to help support the buttons and buttonholes. The waistcoat has the same. I used Russia Sheeting in this case. I've also used a heavy linen before, but the correct thing would be a buckram (stiffened linen). I haven't taken the time to make any yet, but it's not difficult.
So there it is! I recently finished a men's suit, jumps, and another gown. Once I finally get images of the customers wearing them, I'll be sure to post those! The interfacing in a man's suit does well to inform how riding habits are done as well.

Wednesday, October 7, 2009

Riding Habit Soon!

This Saturday I'll be back in Indiana for Feast of the Hunter's Moon. If you're in the area make sure to visit and wave me down! I'm almost done with my riding habit for it. I still have to finish the hat (I blocked it today), stitch on the rest of the buttons, make a cravat, and figure out hair. I've given you all a sneak peek, the full inside out to come soon. I've also recently finished some men's small clothes and are ready to start a hunting coat and under-breeches. Add in some jumps and I should have some fun posts coming up soon!

Wednesday, September 2, 2009

Grand Opening

My Etsy shop opened today as well as my local tailoring business. Here's a peek at what went up today:


I've got some other fun things coming soon as well including some aprons, kerchiefs, hats, embroidery, leather gloves, and hand-painted fans: