Showing posts with label Gown. Show all posts

Wednesday, July 4, 2012

Chemise Gown

Last night I met up with a group organized by Julie Rockhold for a dinner at Christiana Cambells.  I had purchased striped cotton lawn from B&T a couple of months ago inspired by the famous Antoine Vestier portrait.  Being hot and humid outside, it seemed like a good excuse for a summer gown!

The gown is cotton, but the long sleeves are silk taffeta.  There's also a silk gauze piece which shows in the neckline.

The gown bodice is unlined- the portrait is so sheer it couldn't be lined in front at least.  The sash is a vintage 6" ribbon.  I haven't tried lighting it on fire to find out if it is silk or not.

Most of the hair is my own- just the long curls are pieced on.  I'm not quite shoulder length, but it's not hard to get a good sized hedgehog with shorter hair.  There's also powder in it; a mix of the Bumble & Bumble spray and cornstarch since the spray ran out.

The original 1785 portrait.  One of these days I'll powder my hair that much.

The photos below are of the group at dinner and after.  The ones without flash are blurry and the ones with look like a bad ghost hunt, but I can't leave out my dapper tablemates!


This photo is courtesy of Lyze.  And, yes, that is her real hair!!  Also, note Julie photobombing perfectly.

Sunday, June 24, 2012

Cornwallis' Advance on Yorktown

In the summer of 1781 the British troops were advancing towards Williamsburg.  Just across the river from Jamestown is a plantation known as Smiths Fort (built in the early 17th century with some evidence still visible).  It's owner, Mr. Faulcon, was a patriot who helped the troops by allowing them to stay on his land after the British burned much of Cobhams Wharf.  I went out to show the shoemaking trade.
It's a beautiful museum inside- one of Virginias hidden treasures.


Mr. Balances coat I made up this week- based on the unlined extant at CWF.  The Virginia cloth used was very easy to work with, and very light!  The front has facings to cover the buckram layers and the back has a small section up at the shoulders to finish the collar, but the rest is unlined.


The Faulcons out for a light picnic (Bryan Kennedy and Taylor Shelby).


Dinner on Sunday was fresh corn and fish breaded with cornmeal and grits.  The day before we had a ham and vegetable stew.  Of course, there was plenty of bread, cheese, fruit, and spirits to go around as well!

I finished my new summer round gown just in time.  It's from B&Ts figured muslin (white with a tiny red stripe).  I made it unlined, based on a 1785 muslin gown at the Met Museum.

The kerchief is cotton lawn, on which I still need to put a few more tucks at the edges.  The hat is based on images like this and this.

Thank you to Kelsey Freeman for taking my picture!

There was, of course, shooting.  Although no one thought to bring any ammunition, so those turkeys we scared up in back of the house got away.

I just wanted to add this photo Wilson Freeman shot of me working on Saturday- it's just too beautiful!

Friday, September 23, 2011

Sailing Away

I apologize for this being fairly short, I'm still exhausted!
I just returned from a trip to Disney World and a short cruise on the Disney Dream.  Usually, neither of these warrants a costume post, however, seeing as I was in DW when they started their Halloween party and I managed to squeeze making two outfits in for the cruise, I do have a few photos.

The pirate costume I wore in DW is not new, but getting to wear it inside a park is!  I don't know if I've posted it here before, though.  The jacket is loosely based on a German woodcut from around 1750.  I wasn't looking for total accuracy, just something lighter and easier to pack than a gown!  The main fabric is worsted wool, the facings and cuffs are linen.  The stomacher is boned, the buttons are metal with ships wheels, and the tie is a lucet cord.

Barbossa came over to greet me during the parade, and, of course, I rode Pirates of the Caribbean then waited to take a picture with Captain Jack Sparrow.

On the day we boarded the ship, I wore a late 1930s style gown which I had an original pattern for.  The fabric is linen dimity (from B&T).  There's a grosgrain ribbon bow and I happened to have a number of vintage buttons that were just perfect in my Grandmother's stash.
I'm not sure it was the best choice, considering how many times I was stopped to ask if I was a particular "character" on the ship (or other questions about the cruise itself).  At least they had the time period right, since the ship is Art Deco.

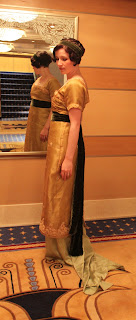
The last outfit was for the final night.  We had a reservation to eat in Remy's, which is a fancy Art Nouveau restaurant (there are five main courses, not counting things like amuse bouche and petit fours).  I'm also planning on making a 1912 gown in the near future.  So, I decided to quickly throw one together based on the pattern in Janet Arnold to wear on the cruise and to give me experience for the nicer one.  I used a vintage sari for the over pieces, silk chiffon between, silk charmeuse, and silk velvet. Unfortunately I had to dye the chiffon and charmeuse because they arrived in hideously bright shades of lime green (so not what the pictures looked like online).


Wednesday, August 17, 2011

1790s Gown 3

I'm unusually busy at the moment, and will be for at least the next two months, so a very quick post of pictures of the gown will have to do for now.  I'll spend more time on the garment construction later.


Three photos below courtesy of Julie Rockhold:


I bustled the back of the gown so I could dance!

Pictures were taken at the Gadsby Tavern's Jane Austen Ball.


Friday, July 22, 2011

1790s Gown 2

Things are coming along nicely with the gown.  Except that I ran out of the second most important embroidery thread very quickly.  I've since ordered more and will get other things out of the way while I wait.  I have the gown assembled, the sleeves embroidered, and the first three (of twelve) sections almost completed with embroidery.  No sequins on the skirt yet, sadly.

I did a full mock-up first, so that I would know just how much fabric I needed and could work out any tiny kinks.  The bodice is terribly forgiving, so not much changed there (I think I rounded the neckline slightly more on the final version).  I did end up making a second pair of sleeves since the first didn't have enough sleeve head.
 The biggest problem, however, was the skirt.  I tried two panels, but it just wasn't enough.  The train turned into a tiny fish tail instead of fanning out.  So, in the silk version I used three panels and then continued to cut the two backs narrower at the side seams until it felt right.  I think I started with around 81" per side, cut it down to 72" (6 designs per side, 12" apart), then removed just a little more to reach 66".

 The first, small bit of embroidery on the train.  I used nice silk thread, some is wrapped with metallic.  It's all very shiny.

 The train fans out nicely now.  Still a bit fidgety, but I think it's because the taffeta is rather stiff.  A few pounds of sequins around the hem will force it down!  I also had to expand the placement of pleats at the back.  Forcing them all into the space of the back width wasn't working.  It just formed a funny lump over my rear.

 I did the embroidery on the sleeves by hand, since it was so tiny (and much easier to manage after it's stitched and hemmed).

You can see all my little marking threads for placement of the hoops.  Much more reliable than chalk.

The sketch for the design.  It's expanded a bit since then (adding in extra hem).  I then used tracing paper to do detailed inked sections, splitting it apart.  I scanned those in, colored them, and converted them into embroidery.

Friday, July 1, 2011

1790s Gown

Well, apparently I am just that insane.  I've fixed myself upon making the purple 1790s gown from KCI.  You can find it in both Fashion and Revolutions of Fashion.  Now, I can't reproduce it exactly, seeing as I need it for August and I'm not exceedingly rich.  Figuring that I can use some machine embroidery, a few other short cuts, and try to find comparable materials it should be feasible.  Overall, the effect should be similar.  Frankly, I don't think anyone is going to fault me for using pre-strung sequins or metallic thread instead of real gold.  It's going to sparkle either way!
The first step for me was to break down exactly what was originally used, then try to find an affordable comparison.
First, fabric.  I'm assuming that I won't stumble across a figured purple silk at $20 or less.  So, I found a plain silk taffeta which is fairly similar in color from Renaissance Fabrics.  I happened to already have a swatch of it, so that was the easy part.  There's a small quantity of appliqued pink silk as well, which I  have the perfect taffeta for already.
The long strands of sequins were, of course, hand-stitched on one by one.  Now, I can find pre-stranded 6mm gold sequins for 83 cents a yard on sale at MJ Trim.  I've never had the opportunity to compare modern to antique sequins, but that should do fine.  I also purchased some loose of the same style for the smaller designs.
There is a large quantity of what appears to be small gold beads all over the designs; on the pink silk, inside the leaves, in the middle of sequin flowers, etc.  They look almost like un-flattened sequins.  I found 4mm brass rondelles which look similar.  However, to purchase enough would be between $60-100.  I'm not sure I can justify that much on just one small aspect.  So, I'm trying 4mm cupped gold sequins, since that's only a $10 investment to at least try to make them work.
Then there is the larger border of metal pieces.  They appear to be foil over a black solid ring (wood, resin?).  As much as I would like to remake those, it just isn't practical.  I looked around for 8mm gold/brass pieces that either had two holes or ran through, but what few there were were expensive ($1 a piece or so).  I also found 8mm metal sequins, so I'm trying those out for about $4.
The regular embroidery is done in silk, which makes that very easy.  The metallic feathers are not difficult either.  I'm assuming they were originally a brighter (untarnished) gold.  However, the large swags are done with chenille.  That is certainly not running through a machine, and is difficult to sew even by hand.  I know it needs to have a different finish than the basic silk.  YLI makes a silk thread with metallic wrapped with it, the colors are subtle enough to look akin to the original.  I'm also debating on a wool/acrylic fuzzy blend.  I'm thinking the silk/metallic might look less out of place.  And for all I know my machine can do some sort of chenille stitch (I need to look into that).
There is also the rope belt and large tassels.  MJ Trim also has metallic cord in a nice brown-gold.  I ordered some 1mm for making tassels and 6mm for the main rope.
All together, this is still going to be a very expensive endeavor, but it could be far worse.  I'm hoping to make a full mock-up of the gown today so I can start sketching out the embroidery designs.  That's creating it's own problems, however, in the fact that I can't find an image of the back.  So, I'm making some assumption I'll talk about later.

Wednesday, January 5, 2011

Hemming

Although it's often the last, and seemingly most simple, step in making a garment, there are a lot of choices that go into a hem. How high? How much turned under? Taped? Faced? Growth tucks? Or even embroidery?

Height mostly varies by class (or some "character" choices) due to the way a garment is used. A silk gown worn mostly inside can be two inches off the floor, or even train in formal situations. But if you're outside working over a fire pit, it would be filthy, ragged, or even dangerous. The general "average" that I like for late 18th century is 3-4". It stays off the ground, only gets dirty when it's raining, but it still looks very nice. I would never go more than 6" up. Even George Stubb's Hayworkers aren't more than 3" up. You aren't going to catch a hem on your shoe that high, nor would it touch the ground when bending over slightly. Be practical, it's easier to hem something another 1/2" or 1" up if it is becoming ragged than to let down.
When it comes to a matching gown/petticoat I usually make the petticoat 1/2" shorter, although I'm sure some of the mis-matched pieces I wear are an inch shorter. Much more and you might consider polonaising the gown to make it less obvious. I try to make all of my petticoats in that range, whether they have a ditto gown or not, since I don't re-enact a wide variety of classes (the fabric would be different quality any way).
Now, early 19th century follows the same rules of class and use, but tends to be longer in length. Walking gowns rise to the ankle, while many afternoon outfits even have trains. Formals are commonly seen with longer lengths in back. Riding Habits are also very long (compared to 18th century habits of normal heights).

The actual hem amount turned under is generally very small. It saves fabric that way. But, it doesn't mean you can't have an inch deep hem, I just wouldn't go much over that. Mine are usually 1/4" or 1/2" turned twice. I'm finding a slightly deeper hem common in the early 19th century, but I haven't researched that too much yet.
Now, there are two exceptions to this style of hem. Binding the bottom edge with a wool tape, often seen on quilted or wool petticoats (even more often with riding habits) allows you to have no turn up or just one turn. If you have a petticoat you want to go back-and-forth in lengths with (two wearers or two personas) that would work well since you would only have to stitch up the shorter length when needed. Or if you cut something a little too short and need that last inch.
Exception two; Silk gowns sometimes have facings. Usually a "cheaper" plain taffeta that seams to the bottom and can fold up a number of inches. Very often seen with trained gowns since it prevents a lot of dirt and wear on the expensive fabric. Easy and cheap to replace this way.

Growth tucks (or pleats) are something seen on many children's garments of the 18th century. Growing children and sharing clothing make them very practical. In the very late part of the century when gauzy dresses are coming into style (already very similar to a child's dress) we start to see them appear in adult clothing. They last through the 1860s. Usually around an 1" deep you can find examples with between 2 and 7 pleats (more later on). On a woman's gown it isn't meant to be adjustable, you even see them on trained gowns. In the 1820s they begin to pad the pleated sections, creating a precursor, perhaps, to the cage crinoline of the 1850s onward. Note on my first link, the lady on the right appears to have pleats, possibly decor on her petticoat. Whether it's an artists flare, formerly a fancier ladies, or a way to make due with second-hand and no cutting I don't know. Might be a fun challenge to seek out more of those!

Now, there is an oddity to how to hem; embroidery. Not just decorating a turned hem, but actually finishing it. Sometimes with scalloping along the edge. Not the most practical to make, but very pretty. Once again, it seems to come with the gauze trend. You do see it on under-petticoats of the 19th century as well.

Don't just look at what other people have made, take the time to do a bit of research specific to your year, fabric, and character. While museum extants show types of hems, their length is obviously skewed by the mannequins used. If you want to see good examples of fashionable lengths, fashion prints are wonderful. For more common folk of the 18th century, John Style's Dress of the People has many paintings of that class you can't easily find online.

Saturday, May 15, 2010

Anglaise Inside and Out

I recently made two Robe A l'Anglaise (English back) gowns. Here are the inside and out pictures of them both:

The first is made from camlet, a mixture of silk, wool, and linen. The skirt is polonaised by ribbons and thread rings on the inside. Front is closed and secured with straight pins. I added a box-pleat trim to the edges.
The back has two pleats which are stitched down. I used two full widths for the back and skirt, seaming together at CB. The fronts lap over the back and are stitched down.
Closer view of the spaced back-stitch used and the pleating. I used 1/4" pleats, but 1/2" are common as well. Notice that the pleats change directions at the pocket slit. You rarely see that on modern reproductions, but it was the most common way to do it historically. There are examples that have them facing one direction as well, but you may find that this way helps with the center back pleats (instead of creating a box pleat on either side of the long back pleats).
The trimming was folded under at the edges and tacked down in four spots on each pleat.
I chose to keep the lining loose at bottom and use it to cover the pleats. You can finish the bodice off entirely and whip the top of the pleated skirt to the bodice as well. That option allows for easier adjustment of size later, but doesn't work as well for a easily fraying fabric. The armscye seams are left raw and open. I've only seen them entirely finished on one women's garment, and we're pretty sure it was made by a male tailor with some odd ideas. Some do have the top half of the sleeve inserted into the bodice, but the lower half then comes out raw. You can whip the edges, but I've found that they tend not to fray too much. Maybe if the garment will be washed?
The second gown is linen. It was made off of the same "shape" as the above gown, but has a few changes in style. I adjust the bottom front to be a narrower tab at the bottom and left off any trimming. The sleeves simply have three tucks in front to shape them.
The back pleats are inverted. There are not many examples of this, but they do exist. You can also choose to do more than just two pleats like my examples. I made a high, narrow neck-line, something increasing after 1775. Eventually gowns will have an almost diamond shaped back piece at the end of the century (most quartered-back as well)
I chose not to put in pocket slits on this skirt since it starts far enough back (and it was one less thing to do on a quick project). Therefore all of the pleats face CB. You can see the box pleats made to accommodate that. There are also a few double pleats at the back to take in some extra fabric.
I finished off the top of the back like all other edges, but you can place a cover piece over those raw edges instead. My pleats hit the corner, but many end mid-way on the shoulder seam. The cover would match those points and follow the shoulder seam up, fold over the edges, and be tacked down as a box shape on the inside.
Same construction on the inside as the first gown.

I know that there are some confusing aspects to building this type of gown, so I'll hopefully get instructions put up soon. Check out the back on this gown.