Monday, July 25, 2011

Revamping a Pair of Shoes 2

Sometimes you just need that unique pair of shoes, but don't have time/money/knowledge to make or order them.  With all the effort I'm putting into my 1790s gown, it would ruin it to not have at least a decent pair of shoes.  However, with so little time, there's no way I can learn how to do a pointed toe last (often done with a metal tip when this severe) and make a shoe.  So, I dug out an old pair of olive green pointed toe pumps from who knows how many years ago to do some work on.  The heel is horribly incorrect, but it's really the toe which will be seen since I have a train.  Looking around for inspiration I found these three images (first two from Shoe Icons, the third I see often but know of no source).


They all have a relatively simple trim around the toe area.  Pleated small ribbon with a "bow" of some kind.  The last pair was particularly interesting for some reason, it looks to be layers of pinked silk tacked down.  I happened to have some ribbon and silk scraps the exact color of my shoes, so off I went to work.


They are by no means perfect, the choke is just too low compared to extants, the toe a bit too long, and the heel very tiny.  However, it's better with a slight trimming distraction, and maybe I'll be able to make a proper pair of shoes by the time I need to wear the gown again!

Friday, July 22, 2011

1790s Gown 2

Things are coming along nicely with the gown.  Except that I ran out of the second most important embroidery thread very quickly.  I've since ordered more and will get other things out of the way while I wait.  I have the gown assembled, the sleeves embroidered, and the first three (of twelve) sections almost completed with embroidery.  No sequins on the skirt yet, sadly.

I did a full mock-up first, so that I would know just how much fabric I needed and could work out any tiny kinks.  The bodice is terribly forgiving, so not much changed there (I think I rounded the neckline slightly more on the final version).  I did end up making a second pair of sleeves since the first didn't have enough sleeve head.
 The biggest problem, however, was the skirt.  I tried two panels, but it just wasn't enough.  The train turned into a tiny fish tail instead of fanning out.  So, in the silk version I used three panels and then continued to cut the two backs narrower at the side seams until it felt right.  I think I started with around 81" per side, cut it down to 72" (6 designs per side, 12" apart), then removed just a little more to reach 66".

 The first, small bit of embroidery on the train.  I used nice silk thread, some is wrapped with metallic.  It's all very shiny.

 The train fans out nicely now.  Still a bit fidgety, but I think it's because the taffeta is rather stiff.  A few pounds of sequins around the hem will force it down!  I also had to expand the placement of pleats at the back.  Forcing them all into the space of the back width wasn't working.  It just formed a funny lump over my rear.

 I did the embroidery on the sleeves by hand, since it was so tiny (and much easier to manage after it's stitched and hemmed).

You can see all my little marking threads for placement of the hoops.  Much more reliable than chalk.

The sketch for the design.  It's expanded a bit since then (adding in extra hem).  I then used tracing paper to do detailed inked sections, splitting it apart.  I scanned those in, colored them, and converted them into embroidery.

Monday, July 18, 2011

Regency Gaming Night

This weekend Gwendolyn and I drove up to Fredericksburg to attend a Regency gaming night at Jenny's (JennylaFleur).  It was a great deal of fun!  We had a small photo session outside before beginning.  There was Cribbage, Whist, and Speculation.  We found our way to the table with Speculation, but I must admit our table eventually dissolved into good conversation.
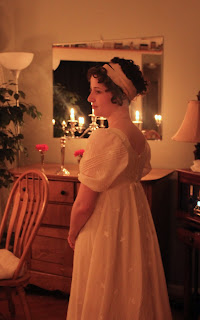
I wore my 1809 Muslin gown.  I rag curled my hair, then used a curling iron to fix up the front portion, wrapped a ribbon around it and pinned a large gold brooch in it.  I wore cameos for jewelry.  I was one of the least sparkly people there, but I'll make up for it at the August event with the 1790s gown!


Photo courtesy of JennylaFleur

Friday, July 15, 2011

1795-99

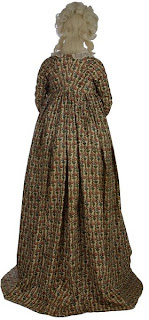
This seems to be a crazy time period.  After spending a great deal of time looking at just evening gowns to decide upon mine, there are so many options!  When else do you see so much asymmetry, sleeves a different color than the bodice, contrasting colors, and crazy feathers??  I can only assume this is what happens during a massive fashion shift where they haven't quite mastered designing with the new textiles yet, and still commonly use the old fabrics in silhouettes not quite suited.  Keep an eye out for varying sleeve styles, waist height, neckline shapes, and closures.
This is also the point where I'm going to stop categorizing everything the same way as before.  At least for this five year period, there are too many options.
Sleeves: Long, just above elbow, or short.  All fitted.
Bodice front: Gathered on cord, crossed, or low under bust.
Bodice back: Small diamond shape, some with numerous small pleats.
Skirt: Open and Closed.  Sometimes gathered in front.  Pleated in back, very small up to large box pleats.
Length: Trains common for evening and some afternoon.
Waist: Some natural waists still seen, most at underbust.
Fabrics: Cotton and silk most common.  Small repeated prints and solids.