
The next step in our series is to understand some of the stitches regularly used in tailoring that you may not know from regular sewing work.


Thread Marking
This is done before the pattern is removed from the cut fabric to note placement of things like buttonholes, pockets, darts, or even seam allowances and corners. It's a slightly more accurate and long-lasting way to mark fabric instead of chalk. I admit I am far more prone to using chalk, but it's a habit I really need to break.

You can simply mark a spot by taking a single stitch in a contrasting thread and leaving the ends long enough, as you can see on the buttonholes in this picture. This also works for longer sections such as the CF line where you'll do a long running stitch and cut the top stitches before pulling the pattern away.

Here you see the result. I tend to use basting thread since it's a little thicker and stands out from most fabrics.
Tailors Basting
I specify that this is not your regular basting stitch, which is more of a very long running stitch. This is used EVERYWHERE. Pin basting is a good start, but it really just doesn't cut it when you're shaping multiple layers and the distortion can cause issue. So, everything gets basted and then sewn. It's a great habit to get into even outside of tailoring.

You'll want to be able to remove this thread easily later and you might not be able to get inside to the start of the stitching. Therefore I don't use knots, but just take one small stitch and leave a tail to start.

The stitches can be fairly long and it really depends on your needle. I don't bother switching over to a basting needle (though I should), so I can't go over 1" long, but longer than that seems unneccesary.

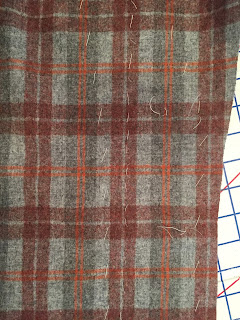
This is technically the same basic stitch, just on a much smaller scale. It's used to stitch down the tailors tape around the edges or along roll lines. I just used two rows here, but three or four is common as well. You can see how they slant different ways- you go up one side and down the other rather than moving the garment around.
Pad-stitching
This is also the same movement as the basting, it's just the proportions that mean you take a small bite and a longer run. Some people prefer to take the bite horizontally, but I tend to be at a slight angle.

The key here is to roll the pieces as you work to get the finished shape. If you have problems keeping the rows somewhat straight and even you can run chalk lines as references. Remember to not go outside of the seam line!

The final result naturally curves. I often do smaller stitches near the lapel point to make sure it doesn't flip back out. You can also see how offset the interfacing now is from the fabric in order to get that curve.

The underside of your pad stitching will have very tiny pips, but won't be visible under the collars fold back. The stitching only extends as far as the roll line (where the basting is in this image).

We'll do the same thing to the collar, the regular basting line showing us where the roll will be. This curve allows us to sit the collar around the neck.

Here you can see that section laying flat. The wool now ripples along the edge.

But, lay it over a curved surface and it's nice and smooth!

The top part of the collar is a more complex curve. Fold along the roll line first and work from center out to both sides.

This is why you want to make sure you don't go past the seam line- it will all be trimmed away. I sometimes will chalk that line in on the interfacing, but because it moves as we pad-stitch it's not completely accurate (but it's a good reminder).
Felling
Yes, this is a stitch you might already know, but it's not the most common in modern sewing. It's used in situations like attaching the undercollar or a patch pocket.

The bite is taken at an angle, but the stitch visible on the outside should be straight up and down. In most fabrics this stitch will disappear easily. This is the undercollar seam, which will be opened up and the stitches invisible at the end.
Other stitches like the back stitch, cross stitch, slip stitch, and running stitch are also used throughout the garments. I won't cover these particularly, because they're quite common, but you'll see a lot of them in the coming weeks! Buttonhole styles and their stitch will be a post of it's own.
5 comments:
Dumb question - I assume that pad basting just catches the main fabric, but mustn't actually show on the right side?
Great tutorial!
It does show, but it's on the underside of the collar so it won't be seen unless you pull it back. Even then it's only very small pricks. I'll try to add a photograph of this. A very good question!
Thank you, that all makes sense now - I'd completely forgotten that this is the underside of the collar.
Unbelievable article in your blogspot feel prod such a great minded person. helpful for who want submit project in collages really for sharing online platform.
best computer institute in delhi NCR
, Best Fine art Institute in Delhi NCR,
Boutique Management with Cutting & Tailoring in Delhi NCR.
Its best way for successfully life and along with read your blogger material content amazing usefully. open sum information on googles about education courses who want join best institute in Delhi for with prefect skills. Show your blogger really excellent article when I love read its very energetic super exiting. Long time searching this type of article for my institute blogs now ended thanks again for sharing online information about education and hight level of skills.
best computer institute in delhi NCR
, Best Fine art Institute in Delhi NCR,
Boutique Management with Cutting & Tailoring in Delhi NCR.
Post a Comment