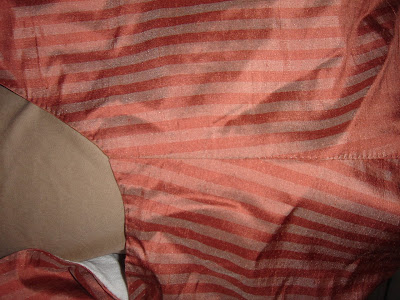
When putting together a woman's jacket or a bodice for a gown, the assembly techniques are generally the same. I've already shown in a previous post how to lay out the front pieces and stitch them together. Leave the seam allowances at the ends un-sewen (shoulder seams, side seams) so you can fold it over later.
When stitching the back seam I generally use a back-stitch on the fashion fabric. The lining can be done the same or with a butted edge. For that you fold over the seam allowance on both sides, put wrong to wrong side and do a very tiny whip stitch. Grab just a few rows of the weave each time. Don't stitch too tightly, but do keep it snug. When finished you pull the two sides apart a bit and the seam should be able to lay out flat (hence why not too tight of stitching). This same technique can also be used on selvages and I've seen it on shirt seams like that. If you're doing a jacket, you can put the fashion and lining backs together and stitch around the neck and bottom hem up to seam allowances.
The sides can also be done a few different ways. I like the method I found in Costume Close-Up. Fold over the front fashion fabric and line it up on the back pieces. You will stitch a spaced back stitch very close to the edge through all three layers. The front lining will then be folded towards the seam and stitched down, enclosing the raw edges. You can also use the same technique explained for the back seam, but use the back stitch on the fashion fabric seam instead.
Sleeves use the same techniques as the side or back seams (underhand whip the hem) and I've seen the armscye left raw and whipped, with all allowances sandwiched in the sleeve, and where it's inside the bodice. It's all up to you and whether your fabric frays and if you want to see stitches externally (and where).
 Exterior of a side seam for a 1790s jacket I'm building. Shows the spaced back stitch on the side seam (horizontal in picture) and the underhand on the bottom hem.
 Repeat imagery of the ever so useful backstitch I keep mentioning.
 The overhand stitch. Same usage as underhand, but shows up as a small dot on both sides. Just up and down with the needle very close together.
 Similar to over hand, but as a seam. Resembles the spaced back stitch in form and function (just doesn't back up on the small visible stitch). Use for side seams or armscyes.
The butted and whipped seam. Not the prettiest of examples, but it would be the lining anyway. (Also used to piece together stays, but I'll be doing a workshop on those in November).
Just like modern stitching you need to find a technique that works for you. Every extant garment is different and there are probably many stitches we haven't ever seen!
My caraco is nearly completed (one more cuff, then some details). I'm hoping to do a pair of mitts soon, a 1780s gown workshop, a stays workshop, and eventually a riding habit workshop in January. I move in two weeks, so if I disappear for a while I promise I'll be back!

Very helpful. Embroidery Digitising Services Thanks a lot.
ReplyDelete